The MAME Cabinet Build Process
Visit my blog for the journey: The blogBelow is just notes, it will eventually contain the full build instructions and drawings.
The Shell
Before we begin, I make no excuses for mixing metric and imperial, this is just the way things are in the building trade and real life.Tools
- Three lengths of 8x4 (feet) MDF (or 2400x1200mm). Get them cut at two at 730mm and one at 66mm. This will match the sizes required for cabinet resulting in less cutting. For the width I chose 18mm (3/4 inch) as the next size down is just too flimsy and hopeless for warping, screwing, etc.
- 8 lengths of 2100x34x18mm for the supports inside the cabinet.
- Sandpaper/glasspaper of various grades. I've got 70 to 100 plus a 600 wet and dry
- Jigsaw (for cutting), or a circular/table saw
- Router (optional, if you need it or if you are fitting T-moldings)
- Something long and straight (e.g. one of the batons - I used a metal edge I had so I knew it wasn't warped) to guide the jigsaw
- Clamps
- Set square (to check your corners)
- Drill
- Compass (for drawing the curves)
- A hammer. Everyone needs a hammer
Material
- Wood glue
- T-moldings (optional). They sell them in lengths sufficient for one cabinet
- Screws. 4x35mm (8x1 1/4 inch). Essentially these will be enough to join the batons (18mm) to the MDF (18mm). A pack of 200 will do
- Screws of other sizes. Undecided yet
- angle brackets (may/may not be necessary depending on how you join things together - i.e. usually to avoid screwing from the outside)

They were bought from B&Q trade (see my blog on how detestable B&Q are and how to resolve these issues) and they provide free cuts like most places. They were cut according to the materials list above.
So where are we with costs, hopefully that is all for the shell (you will need wood glue, and either a jigsaw or router - I haven't decided which to use yet for the curves).
- MDF: £49.40
- Timber: £11.77
- Screws: 2.15
- Total: £63.27
Cutting

Fix some straight edges to guide the router/jigsaw (I used a jigsaw, and while you're there get a spare bit of wood and mark the gap between the straight edge and the edge of the jigsaw/router - you can then use this to quickly place the straight edge to ensure the cut is correct).
Note do not join cuts from two sides (e.g. in the picture to the side do one continuous line - not one cut from the bottom then one from the left - they never meet up properly).
Note also it's quite likely that cutting curves with a jigsaw will result in a slight camber (the edges not straight with one edge higher than the other). You can mitigate this slightly be going really slowly with the jigsaw (or finish with a router). I used my set square (refer to my blog ).
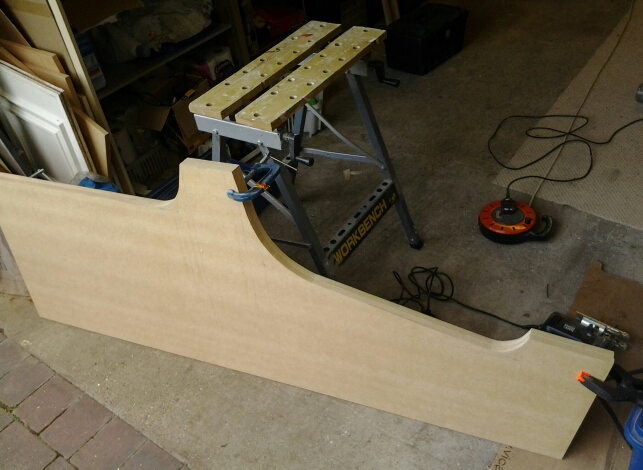
For the curve shown above, once the curve was finished a hole was drilled so that the jigsaw could fit in to do the upward line. When/if you get to a point where you need to rotate the jigsaw just drill a hole big enough to fit the blade in.
 The end result should look something like the picture below. Because you may/will make mistakes, it doesn't really matter that much as long as the end result is vaguely arcade cabinet in looks.
For the second side do not measure and draw, instead trace around the first one, thereby ensuring both are the same. After checking the lines and curves are all true cut out the shape in the same way as the first, i.e. clamp your straight edge and go carefully round the curves.
Once cut, sand lightly to remove the roughness, straighten any cambers as above to make the profile square.
Place the two together (ensure the bottom is aligned first) then clamp. Hopefully they should match. To equal any size differences just sand until happy. This is what you should have now.
Angle brackets (just in case): £4.28
alumimium angles for marquee: £17 (3 will fit one, but I might need 4)
fan cover for rear of cabinet: £2.49
Speakers (Logitech S220): £22
Sandpaper (two each of 240,600,1200 grit): £3
Additional Costs, not specifically for the arcade:
mixed box of graded sand paper: £9.38
filtered breathing mask for cutting mdf £1.41
impact adhesive for gluing aluminium to wood for marquee: £6.18
Tül Perde Modelleri
ReplyDeletesms onay
mobil ödeme bozdurma
nft nasıl alınır
ankara evden eve nakliyat
TRAFİK SİGORTASI
dedektör
web sitesi kurma
Aşk romanları